
|
|
#201
 09-24-2014, 09:30 PM
|
|||
|
|||
|
Here is my PDK housing for the Alonso Clone. I needed some good housing to do the calibration exactly. I've designed my own housing in AutoCad Light and used my DIY CNC Router to create the parts. Now I have to search for an approriate Ferriterod.

|
|
#202
09-24-2014, 09:42 PM
|
|||
|
|||
|
Quote:
You might have problems with coordination.
|
|
#204
09-24-2014, 10:22 PM
|
||||
|
||||
|
Quote:
Probably ferrite coil should be more center pointed in regard to omega coil.
__________________
Global capital is ruining your life? You have right to self-defence!
|
|
#205
09-24-2014, 11:45 PM
|
|||
|
|||
|
Quote:
You tried to do something that can be moved left or right to do what your settings correctly.
|
|
#207
09-25-2014, 09:42 AM
|
|||
|
|||
|
Quote:
No, the ferrite cannot be moved left or right in this design. But if it is absolutely necessary I can modify the design of the ferrite holder and cnc new parts in a couple of minutes. I used the measurements from Andreas's post 81: http://www.longrangelocators.com/for...1&postcount=81
|
|
#208
09-25-2014, 12:35 PM
|
|||
|
|||
|
Quote:
and therefore I tell you some things. It will help a lot in this coordination. And as far as possible fixed structures, because easily detuned. I will recommend you for the reason that you have the technology in your hands, and you can do a good job, I will recommend to the ferrite to create a micro coordination. so that you can restore the coordination Assists per moment where it should.
|
|
#209
09-25-2014, 12:51 PM
|
|||
|
|||
|
Quote:
|
|
#210
09-25-2014, 12:56 PM
|
|||
|
|||
|
Quote:
You can buy a ferrite. There is no need to look old radios. I hope to have good results.
|
|
#212
09-25-2014, 07:08 PM
|
||||
|
||||
|
Quote:
 Did you design the CNC router yourself, or is it from a kit?
|
|
#213
09-25-2014, 09:04 PM
|
|||
|
|||
|
Quote:
|
|
#215
09-26-2014, 04:09 PM
|
|||
|
|||
|
ET on The Earth
http://www.youtube.com/watch?v=N30KlJI5f4k
|
|
#216
10-13-2014, 12:29 AM
|
|||
|
|||
|
The ferrite coils from Alonso PD could be exactly in one of these atomic clocks. They are already tuned for 60 kHz.
http://www.leapsecond.com/pages/sony-wwvb/ 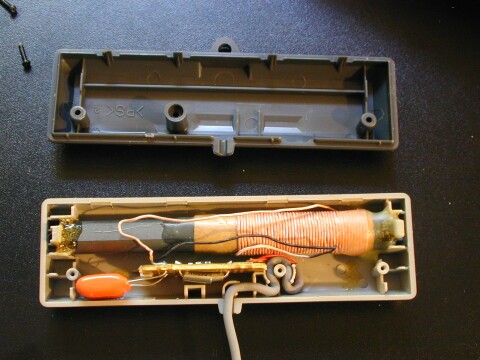 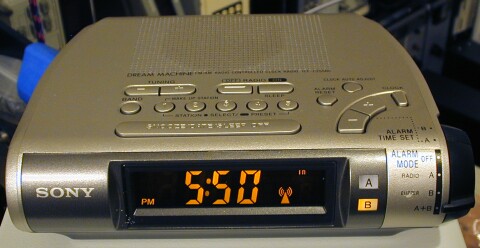
|
|
#217
10-14-2014, 04:41 PM
|
||||
|
||||
|
Quote:
for 
__________________
No matter how the speed of light is high , Darkness is one step ahead .
|
|
#218
10-27-2014, 02:04 PM
|
||||
|
||||
|
Hi all
Sorry for delay send about more infos for PD. After experiments, three months ago, i see PD need new circuits design. I make new design with new extra circuits for more stability , filters etc. Attachment inside PD a photo. I hope next week i have final experiments of course video etc. About reject magnetics or soil lines, ground effects, full rejection all metals except Gold, rain, AC camples 220v, temperature etc, has been solved. About searching without motion or very slow motion PD work has been solved. best regards
__________________
crypton's designer
|
|
#219
10-27-2014, 11:48 PM
|
|||
|
|||
|
hi all
thank you very much Professor Andreas for sharing your projects, I realized your pd but I encountered some problems 1- my setup works as a Pulse induction because it detects all metal 50 mm 2- both led blinking but no sound only if I connect the Q4 collector to the resistance R40,maybe the 555 timer is blown I do not know please help me thank you in advance
|
|
#220
10-29-2014, 05:55 AM
|
||||
|
||||
|
Quote:
PCB and schematic have not error. I am sure 100%, before publish here and of course first prototype work with this. I think you have put "bad part" or put "invert" 555 My opinion. Check botom side pcb with your eyes, step by step for problems Check soldering if are correct and final replace 555 and Q4 with new The best choice is .. use osciloscope and check all sections if you have a friend electronic engineer best regards
__________________
crypton's designer
|
|
#223
10-31-2014, 12:44 AM
|
|||
|
|||
|
Quote:
I checked all the welds and change the NE555 and Q4 but its same problem I will attach a video thank you for your help and I await your recommendations with pacience thank you in advance. https://www.youtube.com/watch?v=vrvvHAyBmdc https://www.youtube.com/watch?v=vrvv...ature=youtu.be
|
|
#225
10-31-2014, 06:07 AM
|
||||
|
||||
|
Quote:
Unconnect C15 and connect power supply. If you have the same tic-tic on buzzer, replace buzzer with other attchment pic. best regards
__________________
crypton's designer
|
 |
|
|


 Linear Mode

